How to process payments for your bills from within the Bills product
Before Bills
In the past, Paytron included the concept of "bill processing" within the Payments tab. A bill would show up as a Draft payment in the Payments table, and you'd process the payment and the bill in one go.
After Bills
With the introduction of the Bills product, we've separated the two concepts. Bills could even be used as a standalone bill-processing product, but the magic is in the tight coupling with extensive payment capability. An important point to highlight is that you'll process all your payments for your bills from within the Bills tab. Once the payment instruction is in Needs Approval status or beyond, it will be represented on the Payments page.
The two key places to pay
During Bill processing
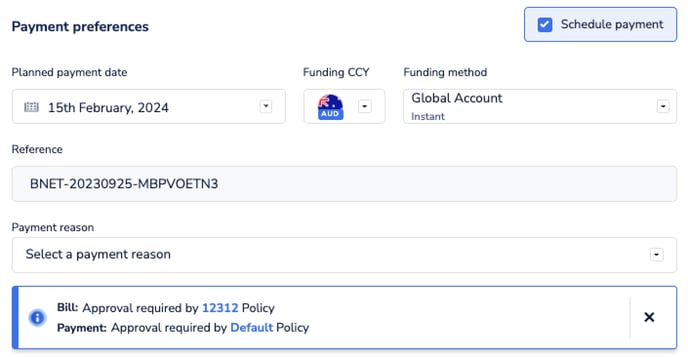
While separating the concepts of Bills and Payments, we didn't want to introduce an extra step for users who didn't need it. That's why you can opt to schedule the payment for a bill while you're processing the bill. If you used this option, payment instruction will automatically be created when your bill is fully approved. If your bill is never fully approved, a payment instruction will never be created.
You'll see a preview of any approval policies that will apply to both the bill and the resulting payment.
From the "Awaiting payment" tab
You can also opt to process your bill without scheduling payment, and then pay your bills by:
- Selecting checkboxes for your bill(s) in the "Awaiting payment" tab, and then
- Clicking on "Review and pay".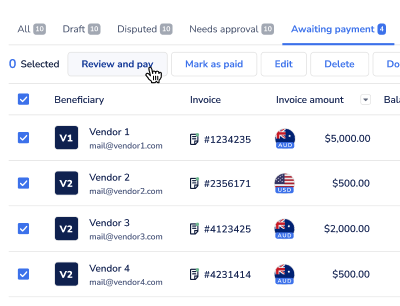
When you click "Review and pay", the following slider will open with payment instructions for all the selected bills (whether that's just one or many).
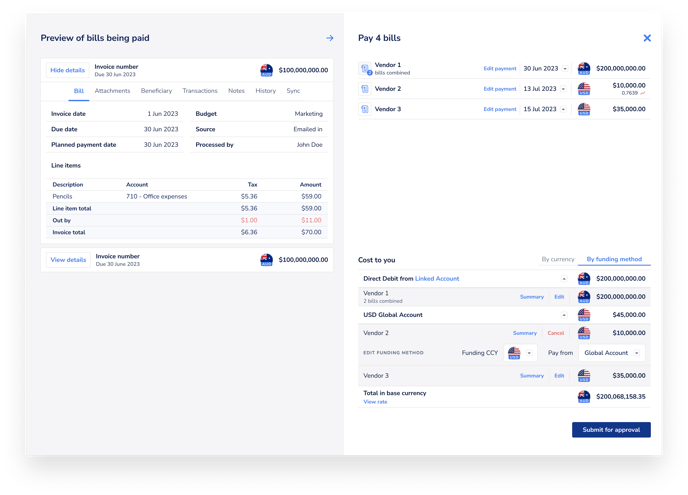
In this slider, you'll see all of the essential payment instruction information on the top right, along with how you choose to fund them on the bottom right.
On the left, you'll see a summary component with detailed bill info relating to a payment instruction.
Once you're happy with all the payment details and funding methods, click the action button bottom right and all the payment instructions will be created. If you have approval policies that apply to these payments, their approval workflows will all apply before the payment is scheduled or processed.
If not, the payment will be scheduled or processed based on the indicated payment date.
Options available while paying from the Awaiting payment tab
1. Combining payment for multiple bills to one beneficiary
If you have multiple bills to the same beneficiary, the app will automatically assume you want to combine the payment into a single amount (often called settling a statement). When the beneficiary gets their email confirming that they've been paid, they'll see a list of all the bills that were paid with key info like amount and invoice number.
If you'd prefer to send the payments in separate amounts, just click on "Edit payment" and select the "Pay these separately" option.
2. Paying a bill in instalments
If a bill has monthly instalments or some other periodical payment plan, you can opt to pay in instalments by selecting "Edit payment", and then selecting the "Pay in instalments" checkbox in the resulting accordion dropdown.
With instalments, you can opt to pay the full amount in any schedule you like, only processing it once and having all the individual payment instructions automatically created for you. You'll see an indicator for the percentage of the bill total that your instalments are covering, and you can opt to schedule the full bill amount, or you can also pay a single instalment and return to pay the balance later.